
How to Clean Evaporator Coil Without Removing?
How to Clean an Evaporator Coil Without Removing It
Regular maintenance of your air conditioning system is essential to ensure its optimal performance and longevity. The evaporator coil, located inside the indoor unit, plays a crucial role in the cooling process. Over time, dust, dirt, and debris can accumulate on the evaporator coil, decreasing its efficiency. Cleaning the coil without removing it can be a relatively simple process. Here’s a step-by-step guide to help you get started:
Step 1: Safety First
Before you begin cleaning the evaporator coil, it is important to ensure your safety. Turn off the power supply to the air conditioning system to prevent any electrical mishaps. You can do this by flipping the circuit breaker or shutting off the appropriate switch in your electrical panel.
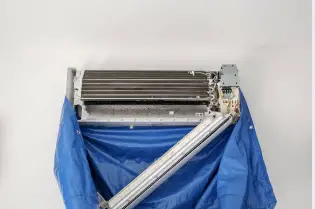
Step 2: Accessing the Evaporator Coil
Locate the access panel on your indoor unit. This panel is usually located near the evaporator coil. Remove the screws or fasteners that hold the access panel in place, and carefully remove it to gain access to the coil.
Step 3: Removing Loose Debris
Using a soft brush or vacuum cleaner with a brush attachment, gently remove any loose dust or debris from the evaporator coil. Be careful not to bend or damage the delicate coil fins. Remove as much loose debris as possible before proceeding to the next step.
Step 4: Applying Coil Cleaner
Purchase a commercially available evaporator coil cleaner from your local home improvement store or HVAC supply company. Follow the instructions provided on the product for the best results. Typically, coil cleaners come in a spray bottle. Apply the cleaner evenly across the surface of the evaporator coil, making sure to cover all areas.
Step 5: Allowing the Cleaner to Work
Allow the coil cleaner to sit on the evaporator coil for the recommended amount of time, usually around 10-15 minutes. This will allow it to break down and loosen any stubborn dirt or debris that may have accumulated on the coil.
Step 6: Rinsing the Coil
After the cleaner has had time to work, use a spray bottle filled with water or a gentle stream of water from your faucet to rinse off the coil. Be cautious not to use excessive water pressure that could damage the coil fins. Continue rinsing until all the cleaner and debris are washed away.
Step 7: Reassembling the Unit
Once the coil is clean and free from debris, reassemble the access panel by securing it back in place with the screws or fasteners. Ensure a proper seal to prevent any air leaks.
Note: If you are uncomfortable performing these cleaning steps on your own or if your system requires a more thorough cleaning, it is recommended to contact a professional HVAC technician to handle the task.
Regularly cleaning the evaporator coil without removing it is an effective way to maintain the efficiency and performance of your air conditioning system. By following these simple steps, you can ensure that your system continues to provide cool and comfortable air for years to come.