
How to Remove Nest Thermostat?
If you’re upgrading your home’s heating and cooling system or switching to a different smart thermostat, it’s time to say goodbye to your Nest thermostat. Removing it may seem daunting, but with a few simple steps, you can do it without any trouble. In this article, we’ll guide you through the process of removing your Nest thermostat with ease. So, let’s get started!
Say Goodbye to Your Nest Thermostat: Easy Removal Steps!
Removing a Nest thermostat is a straightforward process that you can complete within a few minutes. Here are the steps you need to follow to remove your Nest thermostat:
- Turn off the power to the HVAC system: Before you start removing your Nest thermostat, turn off the power to the heating and cooling system. You can do this by switching off the circuit breaker that powers the system.
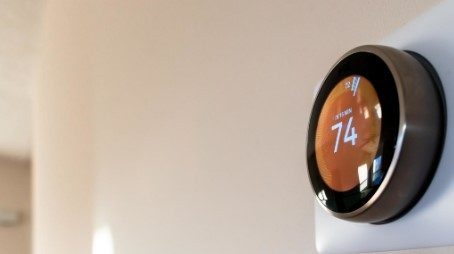
- Remove the Nest thermostat from the wall: Take off the Nest thermostat from the wall by applying gentle pressure on the side of the display. The Nest thermostat is designed to snap off the base, so you don’t need any tools.
- Disconnect the wires: Once you remove the Nest thermostat, you’ll see wires connected to the base. Gently pull the wires and remove them from the Nest thermostat. Remember to label each wire according to the terminal it was connected to.
Keep Your Home Up to Date
Upgrading your home heating and cooling system can be a daunting task, but it’s worth it to keep your home tech up to date. If you’re uninstalling your Nest thermostat, it’s essential to follow the right steps to ensure a smooth process. Here are some tips to keep in mind:
- Choose the right replacement: If you’re removing your Nest thermostat, it’s time to upgrade to a more advanced smart thermostat. Research different options and choose the one that best fits your needs.
- Follow the manufacturer’s instructions: Each smart thermostat has its installation process. Make sure you read the manufacturer’s guide before installing your new thermostat.
- Hire a professional: If you’re not confident in your DIY skills, it’s best to hire a professional to install your new thermostat. This will ensure that your new thermostat is installed correctly and avoids any potential damage to your HVAC system.
Removing your Nest thermostat may seem complicated, but with the right guidance, it’s a piece of cake. Follow the steps we’ve outlined in this article, and you’ll have your Nest thermostat removed in no time. Remember to keep your home tech up to date by choosing the right replacement and following the manufacturer’s instructions. With a new smart thermostat installed, you’ll enjoy a more comfortable and energy-efficient home.